Case Studies
How Claude Built a Custom MailerLite Newsletter Header and Footer
MailerLite's drag-and-drop editor is fine for newsletter content. Your header and footer deserve more. How I built custom HTML bookends with Claude, no code.
10 Feb 2026 · 10 min read · By Sophie Kazandjian
How I used Claude to build custom HTML bookends around MailerLite's drag-and-drop editor
MailerLite's drag-and-drop editor does a good job for the body of a newsletter. For the content that changes every week, you don't want to be in code each time.
The header and footer are different. They stay the same on every send, they're the first and last thing anyone sees, and they're where the editor's limits start to show.
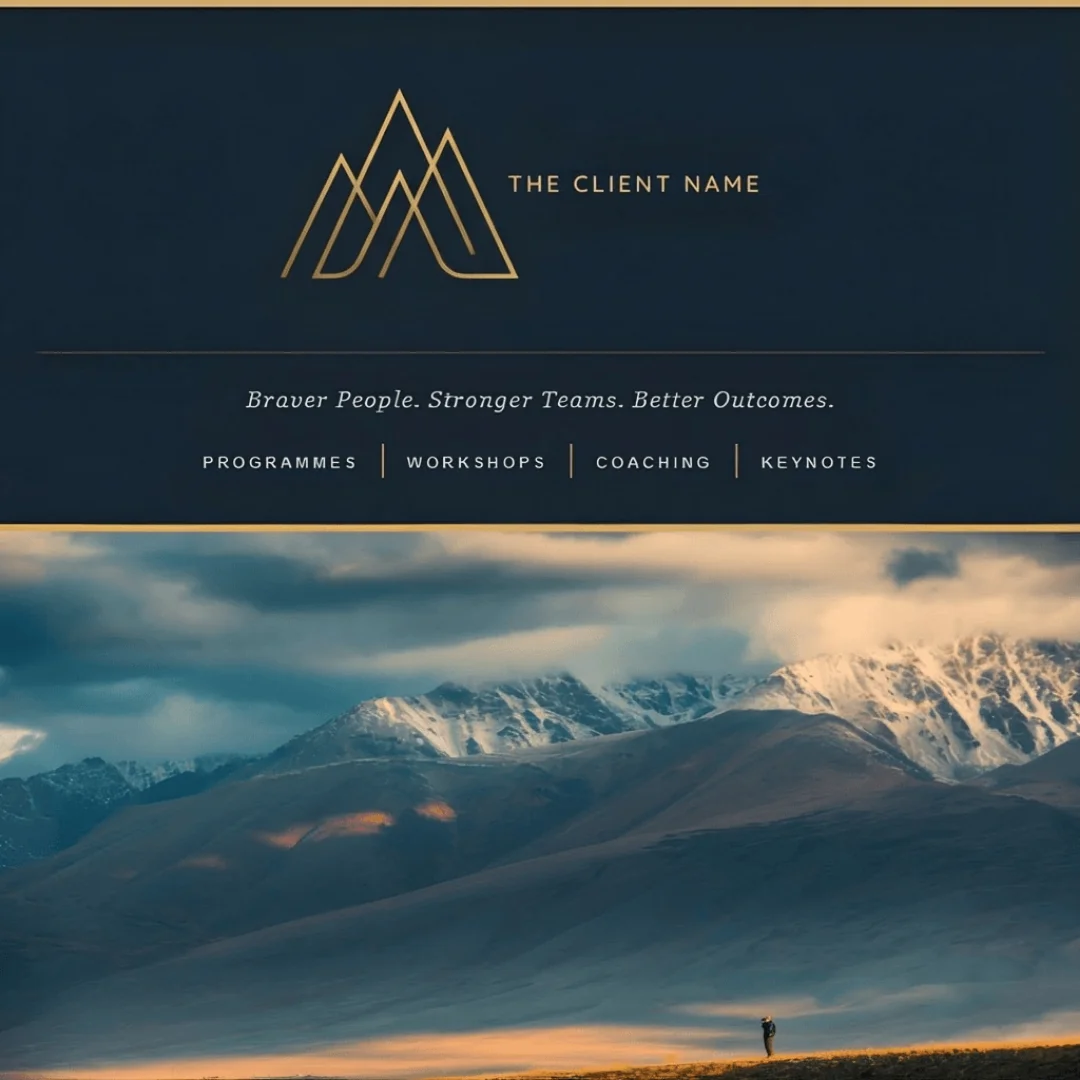
I noticed this most clearly on a recent build for a leadership consultancy. Deep navy, warm gold accents, a serif wordmark, the kind of brand whose website is quietly precise. Their drag-and-drop newsletter header sat at a different level of polish from the rest of the brand, and the footer felt like a different brand entirely. Body content was fine in the visual editor. Bookends weren't.
So I partnered with Claude to write custom HTML for the header and footer and kept the drag-and-drop editor for the content in between. The bookends do the brand work; the middle stays quick to edit each week.
Where the drag-and-drop editor stops being enough
The visual editor is fine for the body of the newsletter. Where it struggled on this build was the header and footer, the parts that define the brand across every send.
Colour and typography control is surface-level. You can change a background and pick fonts, but you can't layer subtle opacity onto a gold accent line, or set the kind of letter-spacing and small-caps treatment that makes a header feel crafted rather than templated.
Full-width backgrounds are awkward. Email design relies on a nesting pattern: an outer table at 100% width that carries the background colour edge to edge, and an inner table constrained to 600px for the content. The drag-and-drop editor doesn't expose that structural layer, so background colours tend to stop at the content edge and leave white strips down the sides on wider clients.
The brief called for desktop navigation with thin gold hairlines between each link, the kind of small detail that does a lot of work. MailerLite's nav blocks don't go that deep.
Default social icons came in fixed styles that wouldn't sit on a navy background in the right tone of gold. Custom icons were the only way to get the row to read as designed rather than dropped in.
What "AI partnership" actually means here
The thing people misunderstand about working with AI on technical projects is that the AI doesn't make the creative calls. I did. What it can do is take good brand materials and produce a credible first attempt, which is a different kind of help.
My role through the build was strategic direction and quality control. I chose which brand materials to share, wrote the brief for what each bookend should communicate, and evaluated every output. The judgments that mattered were mine: that gold's slightly off, those dividers are too heavy, the spacing on the right is uneven, the logo wants to be smaller by maybe ten pixels.
Claude's role was technical implementation with reasonable taste. It read the brand materials, picked up the visual language, and generated a first draft that captured the tone well enough to react to. When I said the logo needed to come down to 80px, Claude adjusted the dimensions in the next message. The gold getting changed was the same loop, and so was the mobile nav, which Claude turned into a media query.
This division works because I don't need to know how to write a CSS media query. I do need to know whether the design lands. Those are different skills.
The AI can't make the call about whether something is on-brand. Once that call is made, it can write the code faster than I would by hand. When the upfront brief is detailed, the first draft lands around the 80% mark, which means the time goes into refinement instead of starting cold.
How the build actually ran
The process is conversational, but I'm directing at every stage.
I started by sharing brand context. The client's website, their brand lookbook, their logo file as a transparent PNG. I described what the header should contain (logo, tagline, navigation structure) and what visual tone I was looking for.
Claude wrote the first HTML. Because it had the brand materials, it pulled the right colours from the lookbook, understood the typographic hierarchy from the website, and produced something that read as refined rather than corporate. Not finished, but a real starting point.
I pasted it into a MailerLite HTML block, previewed it, and listed what needed adjusting. The logo was too big. Nav dividers were too thick. The gold wasn't quite the right shade. These weren't redesigns, they were the small calibrations you make to take something from 80% to 100%, and each one required me to look at the preview and decide whether the change was an improvement.
Claude made the changes. Each round took seconds because the context was already loaded. I previewed again, kept going.
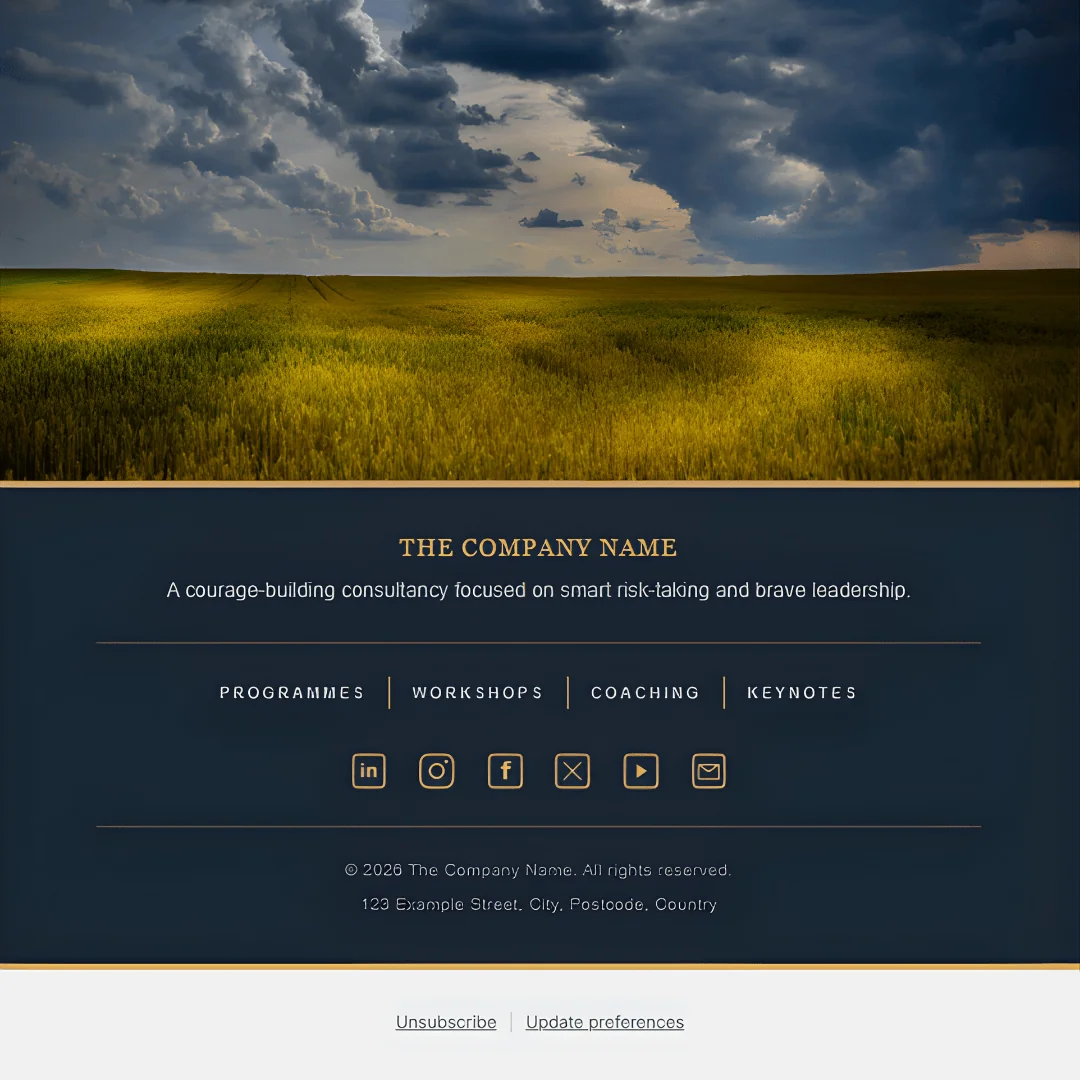
The footer followed the same loop with one extra constraint: it had to mirror the header without repeating it, so the eye reads the bookends as a pair rather than as the same block stamped twice.
The two-table structure is the whole game
The single most important pattern in email HTML is the outer-wrapper / inner-content table. The outer table sits at 100% width and carries the background colour, so the navy bleeds to the edge of the email client. The inner table is locked to a max-width of 600px and centred with align="center". Without this, the background colour stops at the content edge and the email gets white margins down both sides on any client wider than 600px.
Every other technical decision in this build sits on top of that pattern.
Mobile is a separate design problem
Email clients on phones render differently to desktop, and a navigation bar that looks correct at 600px can collapse into something illegible at 320px. I used a media query, @media only screen and (max-width: 480px), to hide the nav links entirely on mobile and show only the logo and tagline. That's a better experience than trying to fit four links across a phone screen.
The other responsive techniques: max-width: 100% and height: auto on images so they scale down without distortion, percentage-based widths on the inner table rather than fixed pixels, and hiding any element that doesn't earn its place at narrow widths.
The custom social icons turned into a small build of their own
The default icons in MailerLite don't sit well on a dark navy background in a specific brand gold. Rather than searching a third-party library and compromising, I asked Claude to generate the set: LinkedIn, Instagram, Facebook, X, YouTube, and an envelope for email, all in #d6af70, all as transparent PNGs.
Claude wrote a Python script using the Pillow imaging library and produced the first set at 48×48 pixels. They looked slightly pixelated when displayed at 24×24, so I asked for 96×96 versions for crisper rendering. Noticeably sharper.
That first iteration also had inconsistent frames. YouTube sat in a wide rectangle, the envelope in a landscape shape, and the others in rounded squares, so the row read as five icons and two outliers. I asked Claude to put them all inside the same rounded-square frame and to scale the envelope down inside its box so it had breathing room. Each fix was a few seconds of regeneration.
One thing to watch: some hosting platforms strip transparency from PNG uploads. If your icons render with a white background, try uploading via the platform's file manager rather than its image uploader, or switch to WebP.
The unsubscribe link caught me out
This one is worth understanding before you start, because the fix is unintuitive.
Email marketing platforms are legally required to include an unsubscribe link in every campaign. MailerLite handles this by appending its own footer block, and its save validation checks for that block specifically.
I built styled unsubscribe and update-preferences links into the custom footer using MailerLite's merge tags, {{UnsubscribeLink}} and {{UpdatePreferencesLink}}. These are dynamic placeholders that resolve to subscriber-specific URLs at send time, and they would have worked correctly when the email went out.
MailerLite wouldn't let me save the template. The validator scans for the MailerLite-generated footer block, not for the merge tags in custom HTML. So the email would have been compliant if it sent, but the platform refused to save it.
The workaround is to delete the styled unsubscribe links from the custom footer and let MailerLite append its own. The platform footer isn't styled to match, but it sits below the custom one and the visual hit is minor.
Gold lines
Two variants of the same colour did most of the heavy lifting on the visual rhythm. A bold 4px line in #d6af70 at the top and bottom of both the header and footer, full-bleed, acting as the bookend. A 1px rule at 40% opacity as a subtle internal divider where one content section met another.
The navigation dividers between links used a slightly different gold, #c4aa5f, sampled directly from the wordmark, no opacity, as a clean 1px left border on each nav cell. Small details, but they're the work that pushes a design past templated.
What you need before you start
Brand assets. Logo as a transparent PNG, the exact hex codes, the font choices, and any brand guidelines you have in writing. The more specific the upfront brief, the easier the evaluation.
A content plan. Decide what's in the header (logo, tagline, navigation) and the footer (about line, social links, contact details, address) before the conversation starts. Have the social media URLs ready. These are strategic calls, not implementation details.
Hosted images. Anything in your email HTML needs a public URL. Squarespace's asset library works. So does Cloudflare R2 if you have it. The URL needs to point directly to the image file, ending in .png, .jpg, or .webp, not to a page that contains the image.
A MailerLite template open and ready. Drag in an HTML block and familiarise yourself with the preview. You'll be reloading the preview every iteration.
The loop
The actual workflow is six steps and each one needs your direction.
I gave Claude the brief and the brand materials.
Claude wrote the HTML.
I pasted it into MailerLite and previewed it.
I listed what needed changing.
Claude made the changes.
I previewed again.
That last step is the one most people skip. You can't evaluate a header from the code, only from the rendered preview at the width your audience will actually open it at. Most of the calibrations on this build happened because I'd already seen the preview and could point at the exact thing that was off.
The whole header-and-footer build took several rounds of iteration. It started from a strong first draft because the brand materials were detailed enough that Claude understood what "refined, courageous, elegant without being corporate" meant in practice. Not every brief gives that much to work with. If yours is thinner, expect more rounds.
Is it worth doing this way
For brands where visual consistency carries weight, it's a one-time investment that pays back on every send. The header and footer get saved as HTML blocks in the MailerLite template. Newsletter content still happens in the drag-and-drop editor each week, exactly as before. Bookends frame it.
Working with Claude rather than hand-coding or hiring a developer means I kept full creative control while delegating the implementation. I don't write HTML. What I bring is brand judgment and the ability to look at a preview and say what's not yet right.
I made every design decision. Claude wrote the code.
FAQs
- Do I need to know how to code to build a custom MailerLite template with Claude?
No, you don't need to write code. But you do need to know what you want and be able to evaluate whether what came back meets that standard. The process is conversational: you describe the brand, specify what each bookend should contain, and provide reference materials. Claude writes the HTML. You preview it in MailerLite and make the calls about what to adjust. If the navigation dividers are too thick, you say so, and Claude changes the pixel width. Spot that the gold isn't matching the brand palette, and Claude changes the hex. You never read or edit the code, but you do bring the design judgment.
- Will a custom HTML header work on mobile?
It can, but it needs to be built with mobile in mind from the start. Standard HTML tables don't reflow on smaller screens. On this build I used a media query to hide the navigation bar on mobile (where it would be too cramped) and percentage-based widths so the inner content table scaled down with the screen. If you ask Claude to make the header mobile-responsive, it will build these techniques in.
- What about the unsubscribe link?
MailerLite requires an unsubscribe link in every campaign and appends its own footer block to handle this. You can use MailerLite's merge tags inside your custom HTML to style the link, but the platform's save validation specifically looks for its own footer block, not for the merge tags. In practice, the simplest path is to let MailerLite handle the unsubscribe link in its automatic footer and keep your custom footer focused on branding. The platform footer sits below the custom one and the visual hit is small.
- Do I legally need a physical address in my email footer?
Yes. CAN-SPAM requires a valid physical postal address in every commercial email. This can be a street address, a PO box, or a registered mailbox. If MailerLite's automatic footer already includes the address, you don't need to repeat it in the custom HTML, but check what's being appended before deciding.
- Which version of Claude is best for this?
I used Claude Pro, which gives access to the most advanced model. The free version generates email-compatible HTML perfectly well, this isn't a task that needs the top-tier model. Where Pro is worth it is in longer iterative sessions, the kind where you're going back and forth refining details over many rounds. The free plan has stricter usage limits, so you might run out of messages mid-session. For a one-off build with several rounds of tweaks, Pro is worth it for the uninterrupted workflow.